
Azure AD Single Sign On (SSO) - Sophos Firewall
Single sign-on (SSO) is a technology which combines several different application login screens into one regardless of the domain, platform, or technology they are using. With SSO, a user only has to enter their login credentials (username, password, etc.) one time on a single page to access all of their SaaS applications. This eases the management of multiple usernames and passwords across various accounts and services.
A good example is when a user logs into a Google account and they become automatically authenticated to other linked services, such as Gmail and YouTube, without having to sign in again to those services. SSO is built on the concept of federated identity, which is the sharing and verifying of login credentials between trusted service and identity providers.
A service provider is a vendor that provides IT solutions and/or services to end users and organizations such as an application or website. An identity provider (IdP) on the other end is a service that stores and manages digital identities. A good examples would be Azure AD and Google Workspace.
Below are some of the protocols and standards associated with SSO are:
- Security Access Markup Language (SAML)
- Open Authorization (OAuth)
- OpenID Connect (OIDC)
- Kerberos
- Smart card authentication
What they are and how they work would be a blog post for another day. Today we will just be looking at how to intergrate Azure AD SSO with Sophos Firewall to authenticate Azure AD users signing into the web adim console.
Configuring App Registration in Azure.
We will start off by registering an app in Azure and assign permissions accordingly to facilitate authentication and authorization between Sophos firewall and Azure AD. This is to establish a trust relationship between Sophos Firewall and the Microsoft identity platform in other words Sophos will trust Microsoft and not Vice versa.
New Azure App Registration
After logging into the Azure Portal, navigate to Azure AD and App registrations, then click new registration as seen in the screenshot shown below.
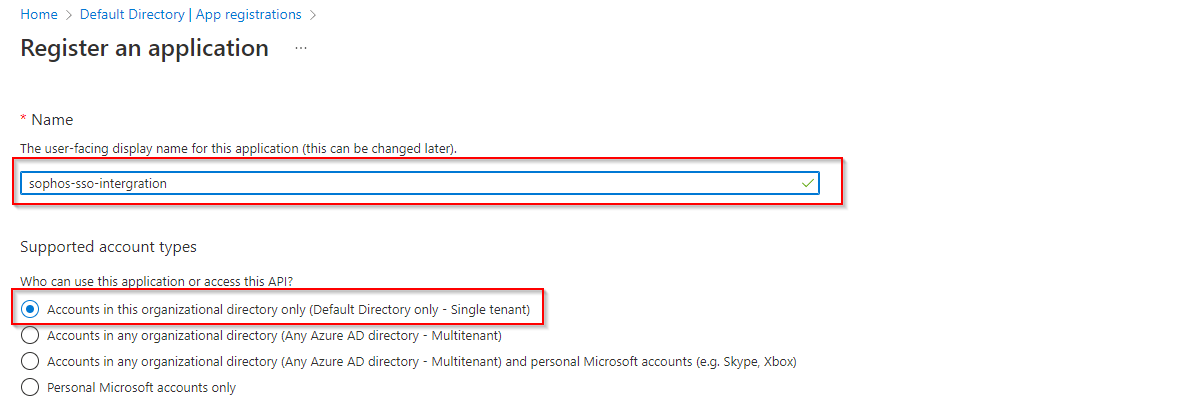
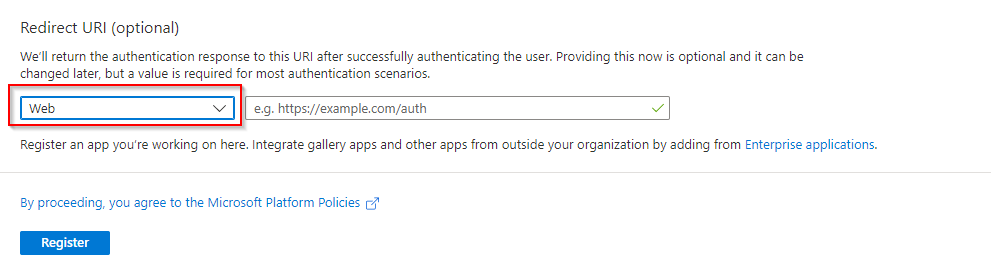
Provide the details and select web under redirection URL. Redirection URL is the location where the authorization server (Azure AD) is going to send the user once the app has been successfuly been authorized.
After the app creation, note down the application ID, Object ID and tenant ID as we are going to use them later in firewall configuration.
Assigning API permissions
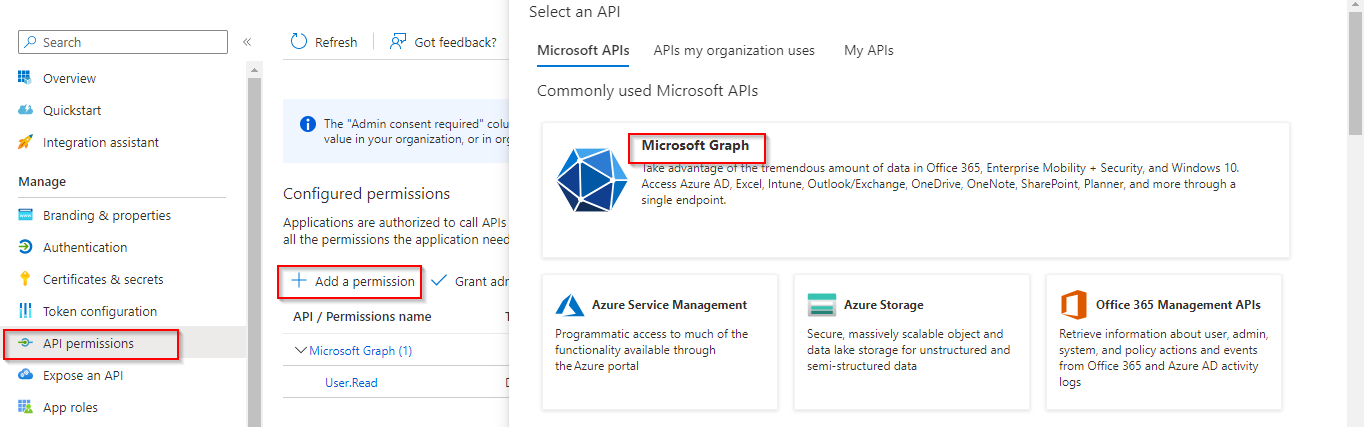
The next step will be assigning API permissions. This is where you will define the configured permissions that allow an account to read or write data depending on the allowed authorizations. In our case we are only going to need [User.Read.All] and [Group.Read.All] permissions from the Microsoft Graph API.
Microsoft Graph API is a RESTful web API that enables you to access Microsoft Cloud service resources.
Click on the newly created app and select API permissions, click add permissions → Select Microsoft Graph → Delegated permissions.
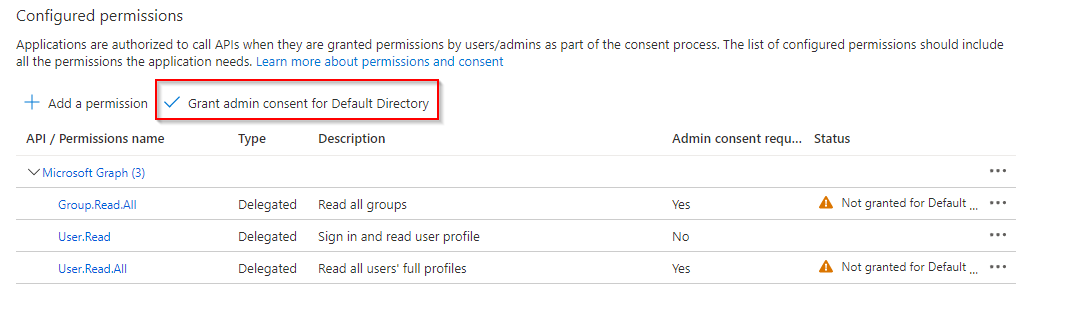
Select and add User.Read.All and Group.Read.All permissions. The Grant admin consent for Default directory exists so that an individual user is not prompted to grant consent for each API consumed. Go ahead an click on the Grant admin consent for Default directory button.
Certificates and Secrets
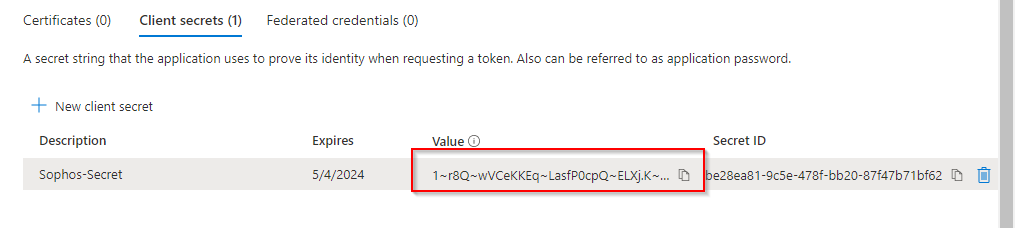
Head over to certificates and secrets section and generate a new client secret that would be passed in during the authentication process.
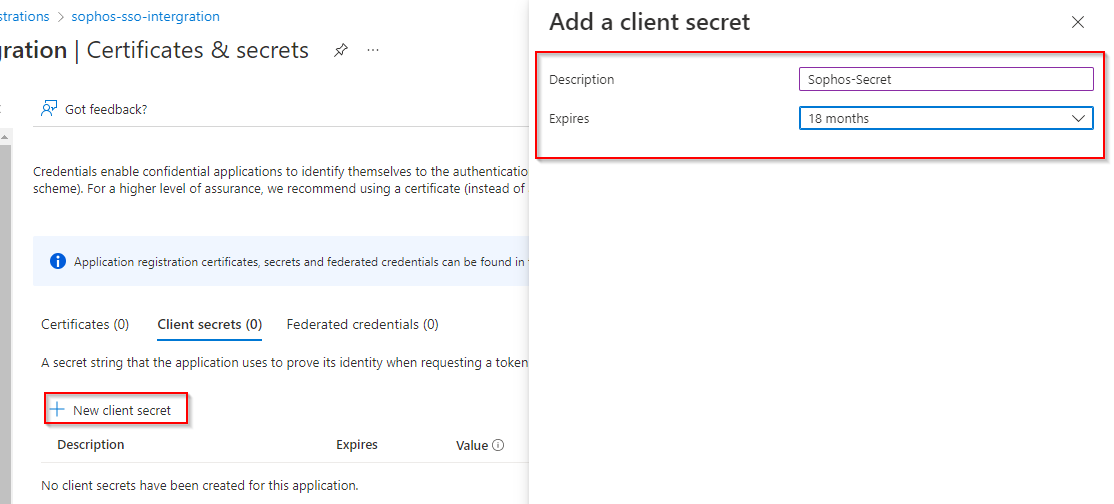
Make sure you copy the secret value and store it somewhere safe, as it won’t be visible the next time you navigate to that blade.
Application Roles
App roles are basically tags associated with a user, group or an application. These tags ultimately get translated into permissions, during authorization. Note that these roles are specific to the application. The role claims for one application are not sent to another application.
The roles we are going to create will allow us to control access and assign appropriate permissions to users signing into the firewall. Should we decide to remove the application from the Azure AD tenant, the roles will go away.
Click on App roles and then Create app role. Provide a display name, choose the both(Users/Groups + Applications) for the member types, provide the value for our role, provide a description, check the enable this app role checkbox, and click the Apply button. Remember the value provided for the role must match with the one that will be provided in the Sophos Firewall.
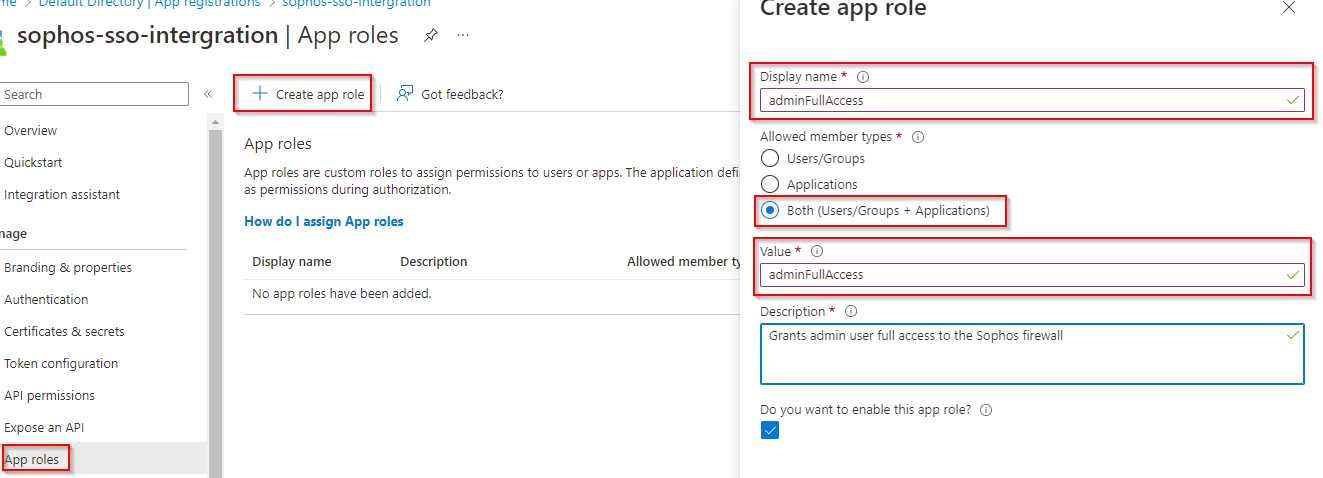
You can add up more different roles.
Assigning Users to the New Roles
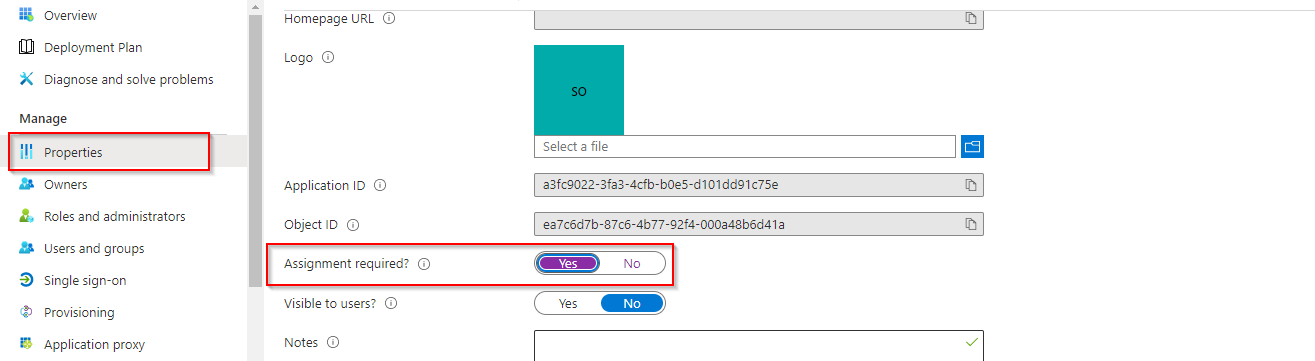
Before we assign roles to our users, we must enable assignment required option in our newly created app. Navigate to Enterprise applications and select our app, then click on properties section. Look for the Assignment required property and toggle it to yes.
Now navigate to users and group and select add user/group select the user you want to add and assign the appropriate roles created previously.

Sophos Firewall Configuration
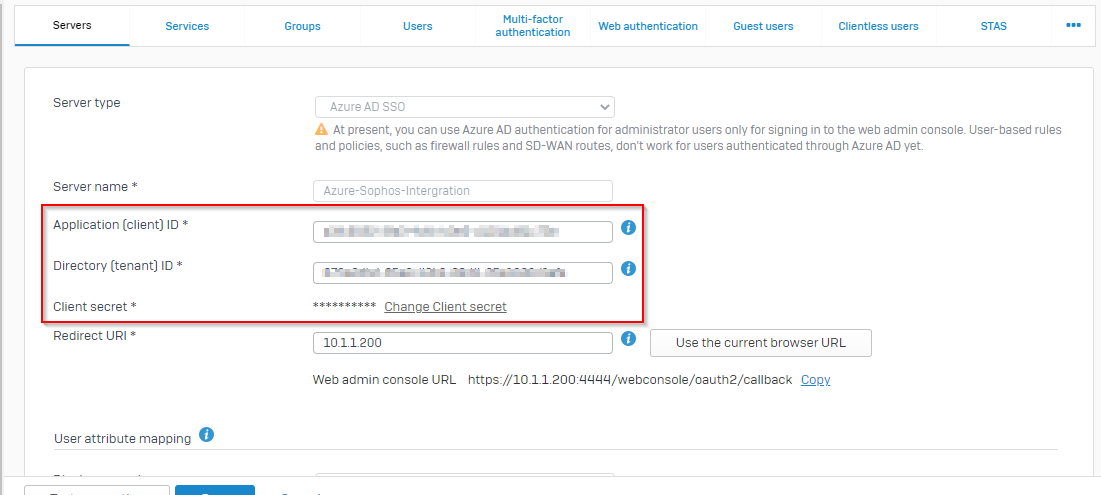
Navigate to your Sophos Firewall web console and click on authentication section. Select the servers tab and click add. Select Azure AD SSO from the server type list. Fill in the details using the information we got from Azure Portal (application ID, Object ID, Tenant ID and the secret key).
Under fallback user group section, select open group. The firewall assigns this group if it can’t find a matching user group locally.
Under Role Mapping section, Input the exact value you specified for the role group in Azure Portal. Select the profile you want in our case it is Administrator. Finally Test the connection.
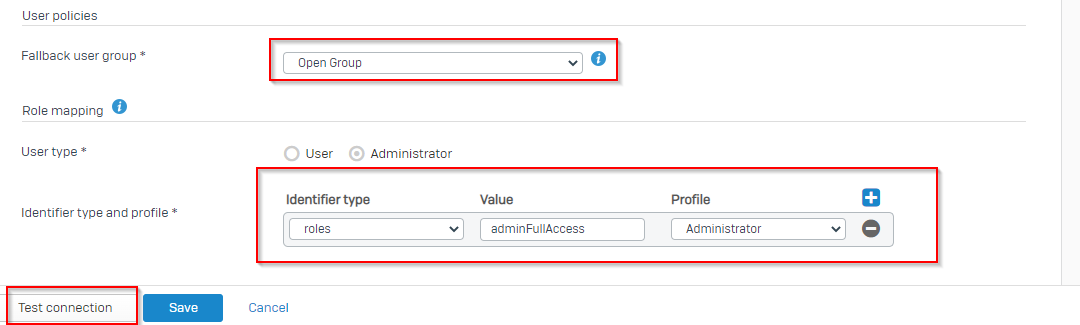
Test the Connection to confirm everything is up and running.

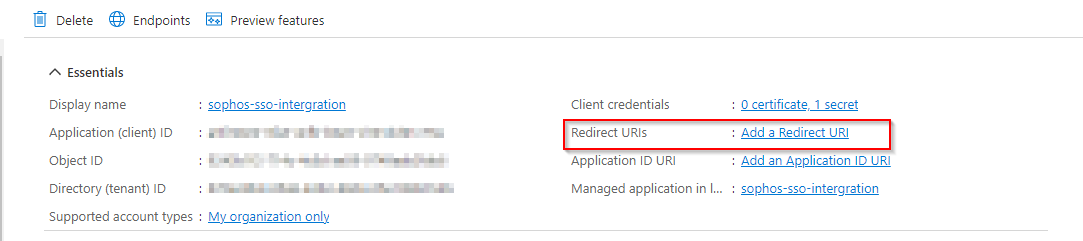
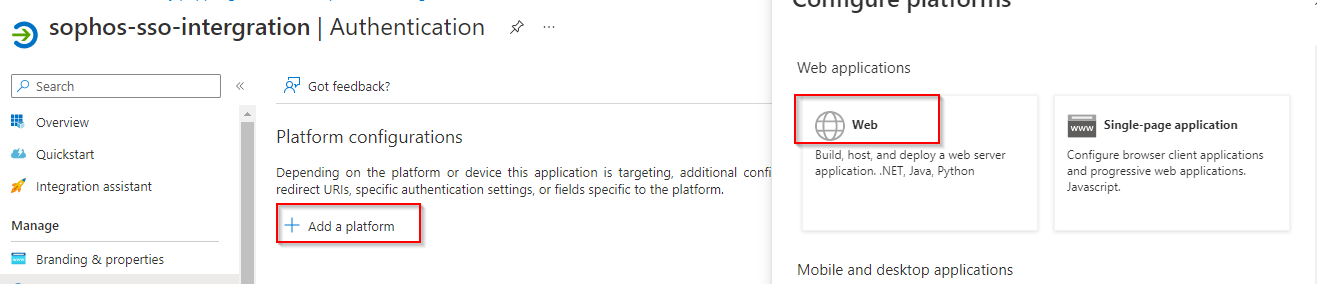
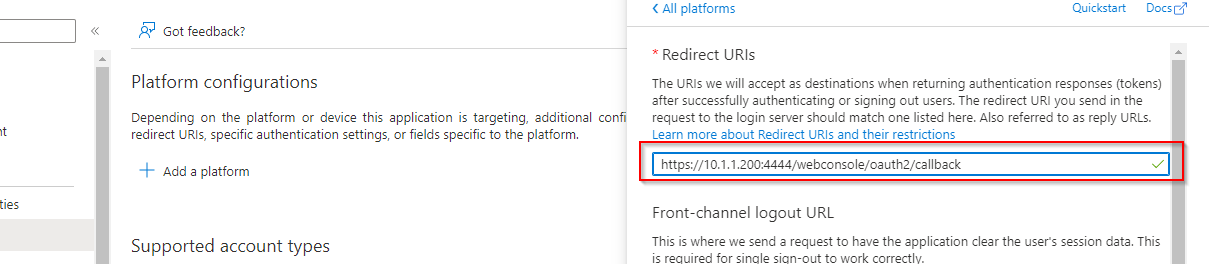
Copy the Web admin console URL and bring it to Azure. Select our app and click on Redirect URls. Click on add a platform and select web, paste the copied url in the Redirect URls section.
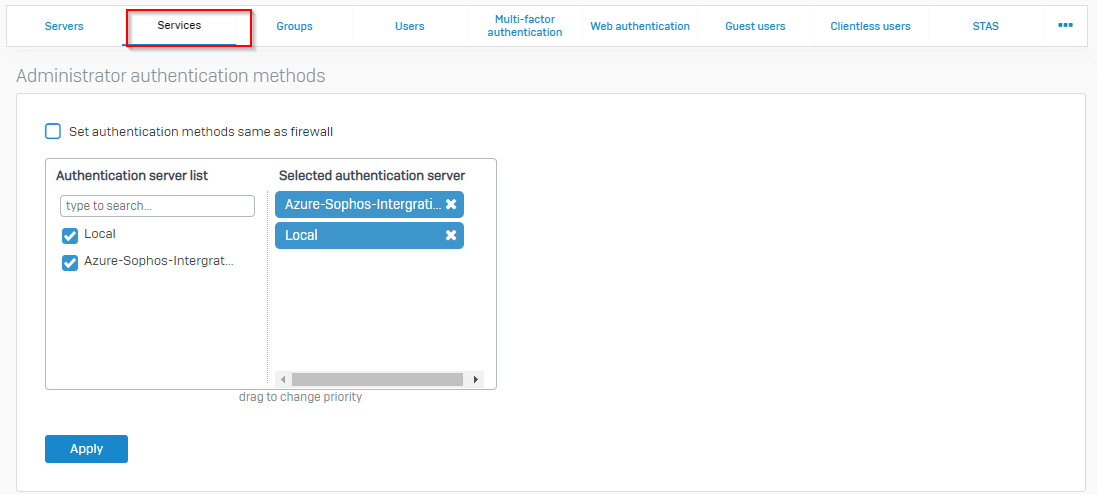
On Sophos Firewall under authentication section select services and scroll down to Administrator authentication methods. Tick the newly created server and move it to the top.
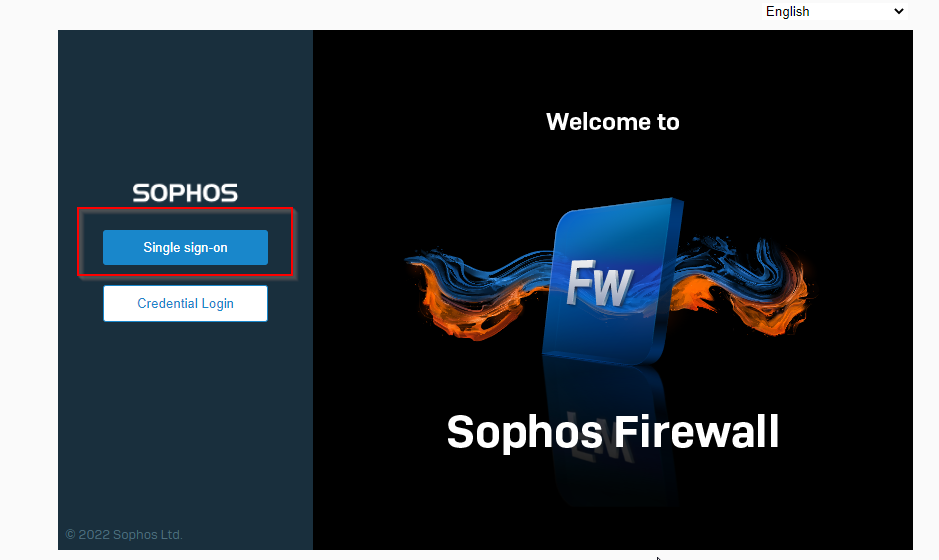
Logout of the application and SSO is now enabled on the log on screen.
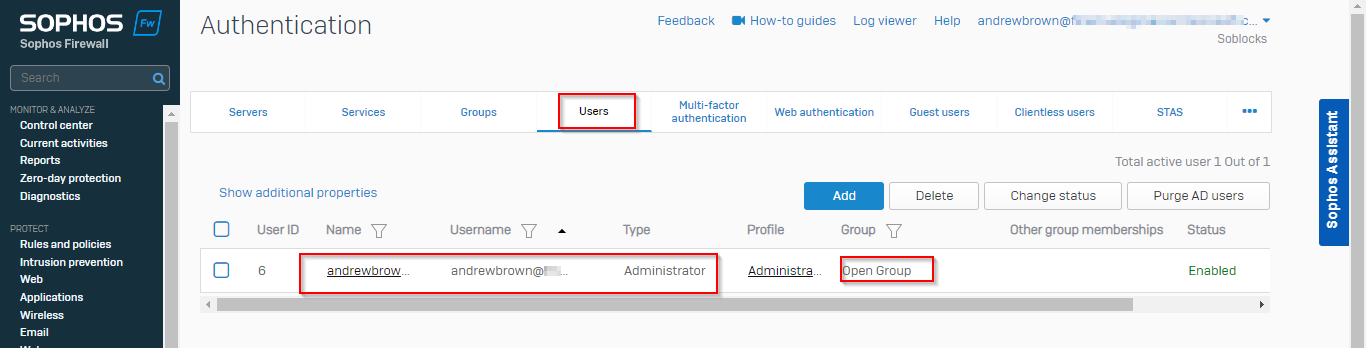
The screenshot shown below shows a user who has logged into the firewall using SSO.
Conclusion
Azure AD integration enables dynamic role and group access management, you can add or remove access to administer the firewall in Azure without changing anything on the firewall.
References:


Leave a comment